Post Processing: Using Unity Shaders
- santosh nalla
- Sep 17, 2020
- 4 min read
Post Processing effect can change the look and feel of your game. But what exactly is Post Processing? Until now we have used our shaders to render individual mesh objects. We have applied materials to individual objects and wrote shaders on top of those materials. This is one use of shaders, right? The other use of shaders is, "Post Processing", where we do not apply our shaders to individual objects, but for image as a whole. what does that mean? Images here means, lets suppose you run your game and its running at 60 frames per second on your computer. 60 frames per second means, 60 "Images" are getting generated for every second. Now here in post processing you apply your shader to those image as we render our game. That means you apply shader to each individual image and do necessary calculations.
Hm, and yes yes you guessed it right. This requires some processing power and usually we do not apply complex post processing effects to our Mobile Games. Well this can work on PC/Consoles games for sure.
So here we are taking about effect which applies to an entire scene. Right? But how are we gonna initiate Post Processing in Unity. If we think about it carefully, we can safely assume that "Main Camera" is our answer. All the images we see after our scene is rendered, we see them from Main Camera. So before creating Post Processing Material/Shader, we first have to attach this small script to our Main Camera.
using System.Collections;
using System.Collections.Generic;
using UnityEngine;

public class MainCameraScriptPP : MonoBehaviour
{
    public Material PostProcessingMaterial;
    private void OnRenderImage(RenderTexture source, RenderTexture destination)
    {
        Graphics.Blit(source, destination, PostProcessingMaterial);
    }
}
"OnRenderImage" is a unity buildin method which is called after all rendering is complete to render image(Once per Image)
It allows you to modify final image by processing it with shader based filters. The incoming image is source render texture. The result should end up in destination render texture. You must always issue a Graphics.Blit or render a fullscreen quad if you override this method.
Inside this we use the function Graphics.Blit which copies the source image to destination image by applying shader to source texture. So here in the above code the shader(PostProcessingMaterial) is applied to source texture and the resulted is copied on to destination Texture which is showed on the screen.
DONE, by writing this code and attaching it to main camera, we have set up our post processing material. All we have to do now is, write a Shader and apply it to that material(PostProcessingMaterial).
Lets start writing a shader now,
Shader "ShaderLearning/PostProcessing_EffectOne"
{
	Properties
	{
		_MainTex("Basic Texture", 2D) = "white" {}
     	        _Color("Main Color", Color) = (1,1,1,1)
	}


		Subshader
	  {

		  Pass
			{

				CGPROGRAM

				 #pragma vertex vert
				 #pragma fragment frag


			        sampler2D _MainTex;
		                half4 _Color;

				struct vertexInput
				{
					float4 vertex: POSITION;
					float2 uv: TEXCOORD0;
				};

				struct vertexOutput
				{
					float4 pos : SV_POSITION;
					float2 uv: TEXCOORD0;
				};

				vertexOutput vert(vertexInput v)
				{
					vertexOutput o;
					o.pos =              UnityObjectToClipPos(v.vertex);
					o.uv = v.uv;
					return o;
				}


				fixed4 frag(vertexOutput i) : SV_TARGET
				{
			          fixed4 col = tex2D(_MainTex, i.uv);
			          return col * _Color;
				}

			   ENDCG
		   }

	}
}
Here i am not gonna explain you the entire CG program structure(Here i assume you already know how to write a basic shader which simply applies Texture on to your mesh).
As i already mentioned, this post processing effect is applied on to each individual image. But in my shader, how am i gonna get that individual image to manipulate with?
The answer to this question is By using "_MainTex" keyword for declaring textures under properties section. Yes you have heard it write. If you are not using _MainTex keyword, your screen is gonna display plain solid color all over. So this _MainTex will keep on string each individual image. All the changes we are gonna do to that image, write those changes in FRAGMENT SHADER function( because here, Vertex shader is meaningless for 2D image texture).
So you can play with each individual pixel of an image in FRAGMENT SHADER.
fixed4 frag(vertexOutput i) : SV_TARGET
{
	  fixed4 col = tex2D(_MainTex, i.uv);
	  return col * _Color;
}
were i.uv gives you the location of an individual pixel
tex2D(_MainTex, i.uv) gives you the color at that particular location of an individual pixel.
fixed4 frag(vertexOutput i) : SV_TARGET
{
	  fixed4 col = tex2D(_MainTex, i.uv);
       //Here you can write your own post processing Code by modifying
         col value.
	  return col;
}
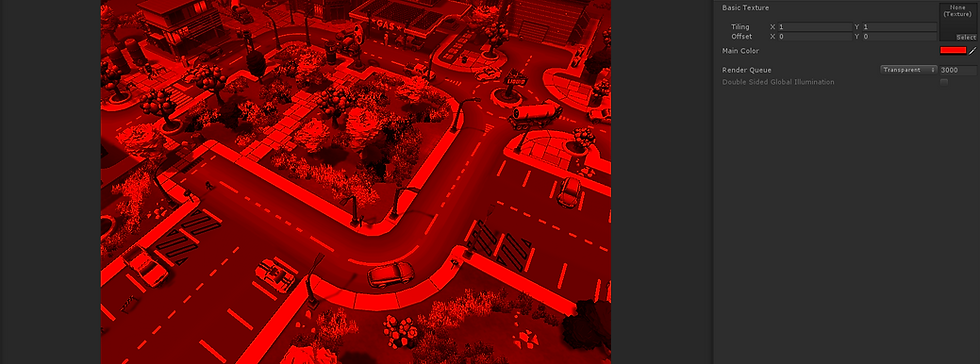
In the above code, i wrote a really simple shader Post processing effect where i multiplied tex2D() wiht _Color(in fragment shader obviously)
 fixed4 col = tex2D(_MainTex, i.uv);
 return col * _Color;
If, in the inspector, i give red color as _Color value - PostProcessing Effect will turn out to be like ---

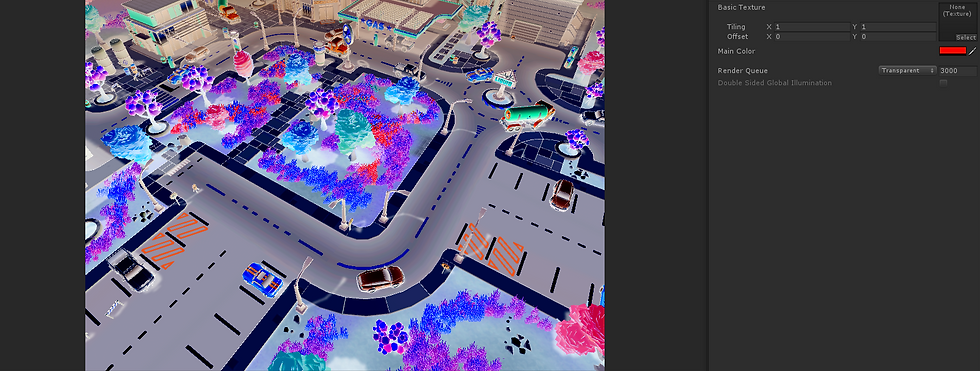
Now lets invert Color and see the Post Processing Effect again how to turns out----
Code:
fixed4 frag(vertexOutput i) : SV_TARGET
{
	//get source color from texture
		fixed4 col = tex2D(_MainTex, i.uv);
	//invert the color
		col = 1 - col;
		return col;

}
Effect output:

Now that i have explained basic of Post Processing, in my coming blogs, i am gonna write some really cool looking Post Processing Effects.


Comments